Below, you will find the six steps you need to follow in order to add yourself and your content to the Criminal Justice in Theatre website:
- Step 1. Sign up for CUNY Academic Commons
- Step 2. Add yourself to the Criminal Justice in Theatre site
- Step 3. Add a new post (for your project)
- Step 4. Add content
- Step 5. Add the correct play to the metadata for your post
- Step 6. Publish
Step 1. Sign up for CUNY Academic Commons
Navigate to the sign-up form for the Academic Commons, and fill it out using your personal information.
Step 2. Add yourself to the Criminal Justice in Theatre site
First, navigate to Criminal Justice in Theatre.
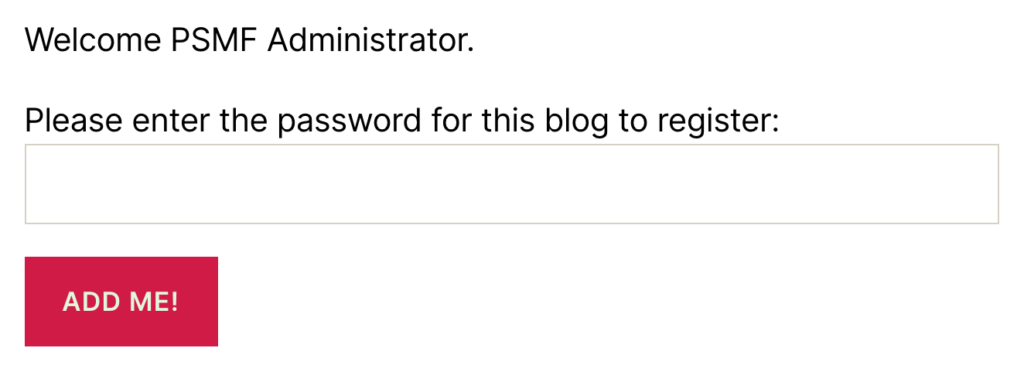
On the bottom of the page, you will see this field.
Fill in the password provided to you by Professor Edwards, and click “Add me!”
Step 3. Add a new post (for your project)
First, go to the administration interface for the course website.
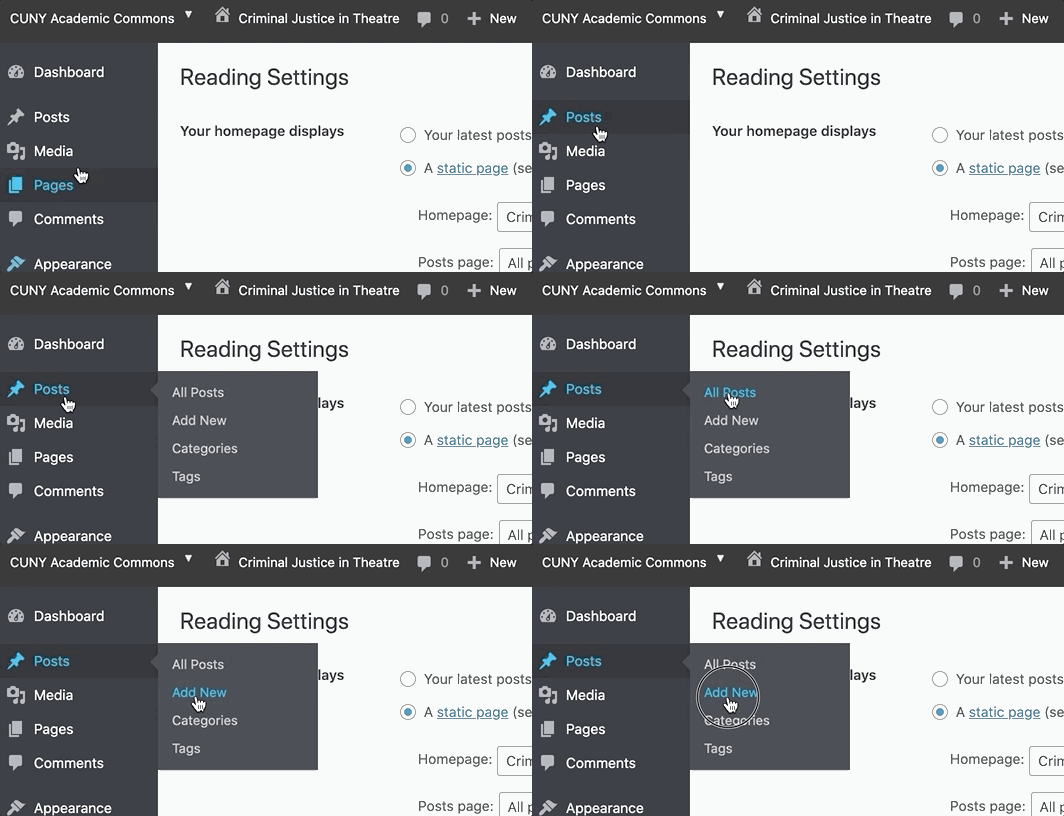
Second, hover over “Posts” in the left-side menu, and select “Add new post.”
Step 4. Add content
Title

First, choose a title for your project and fill it out in the placeholder that says “Add title.” Note: Come up with something better than the play’s title! That will already be in the header of the project so choose something more exciting.
Image
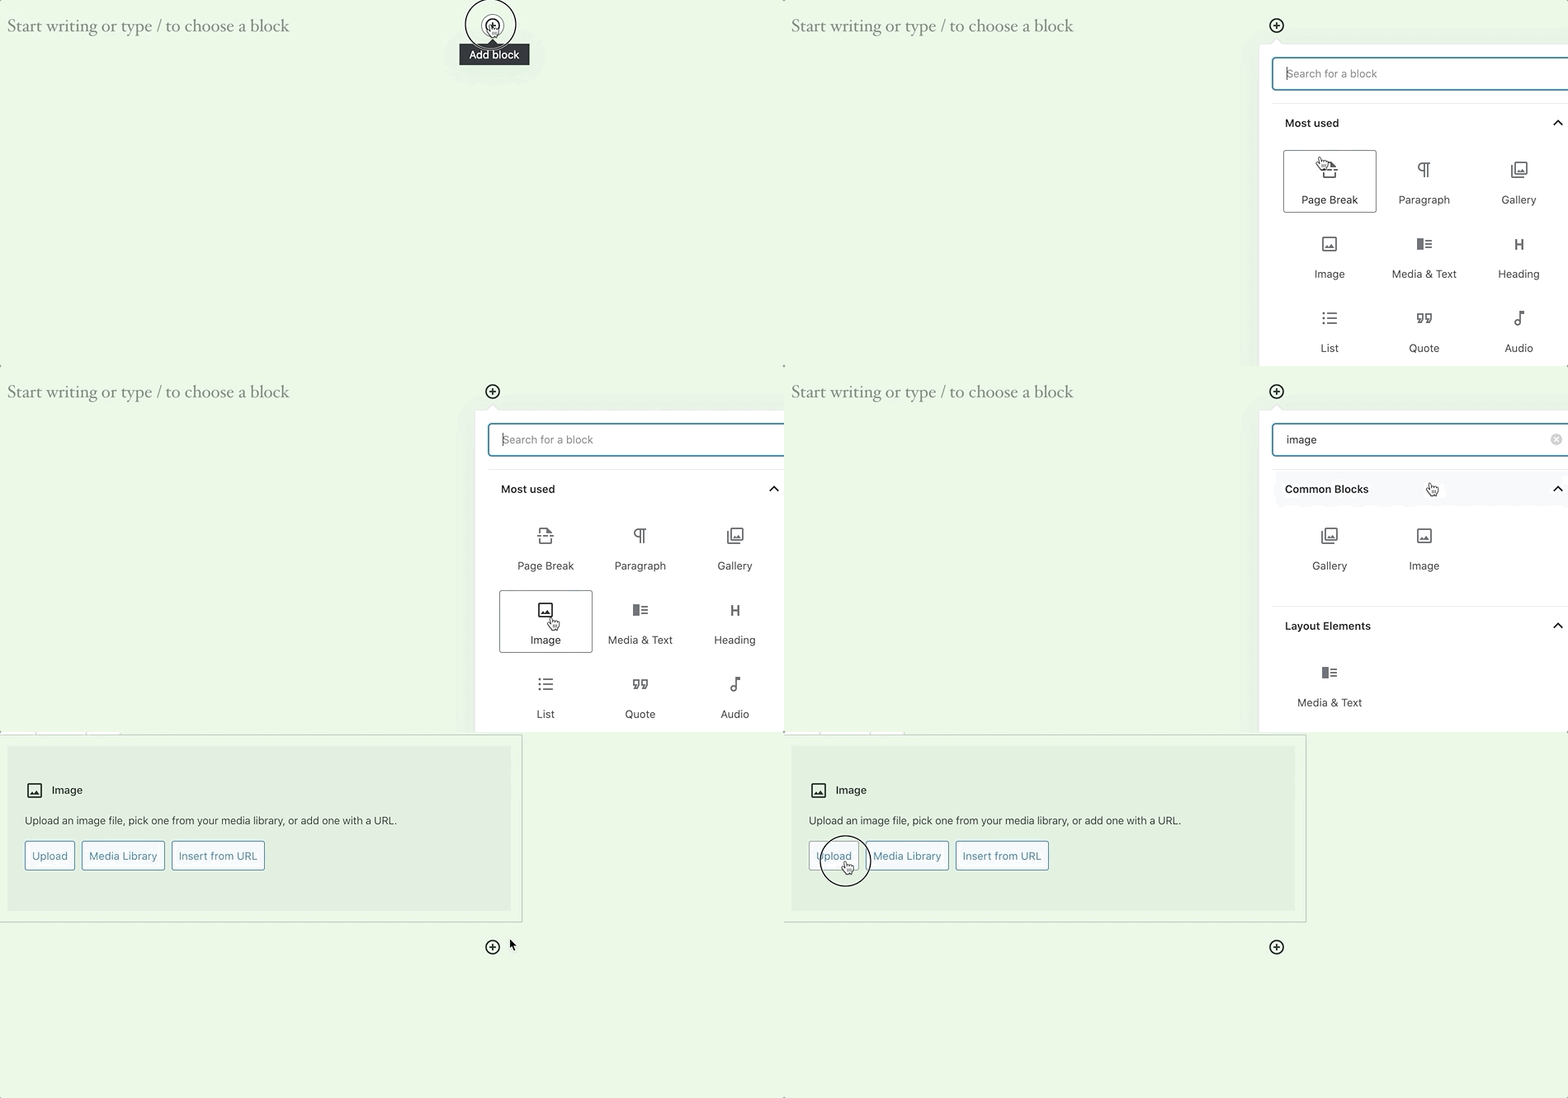
If you want to add an image, you can do so by finding the image block in the “Block browser.”
The browser will open if you click the plus-symbol in a circle next to the following block. You can often find “Image” under “Most used,” but you can also search in the text box for the block type.
Once it has been inserted, click “Upload” to add your image.
Media block
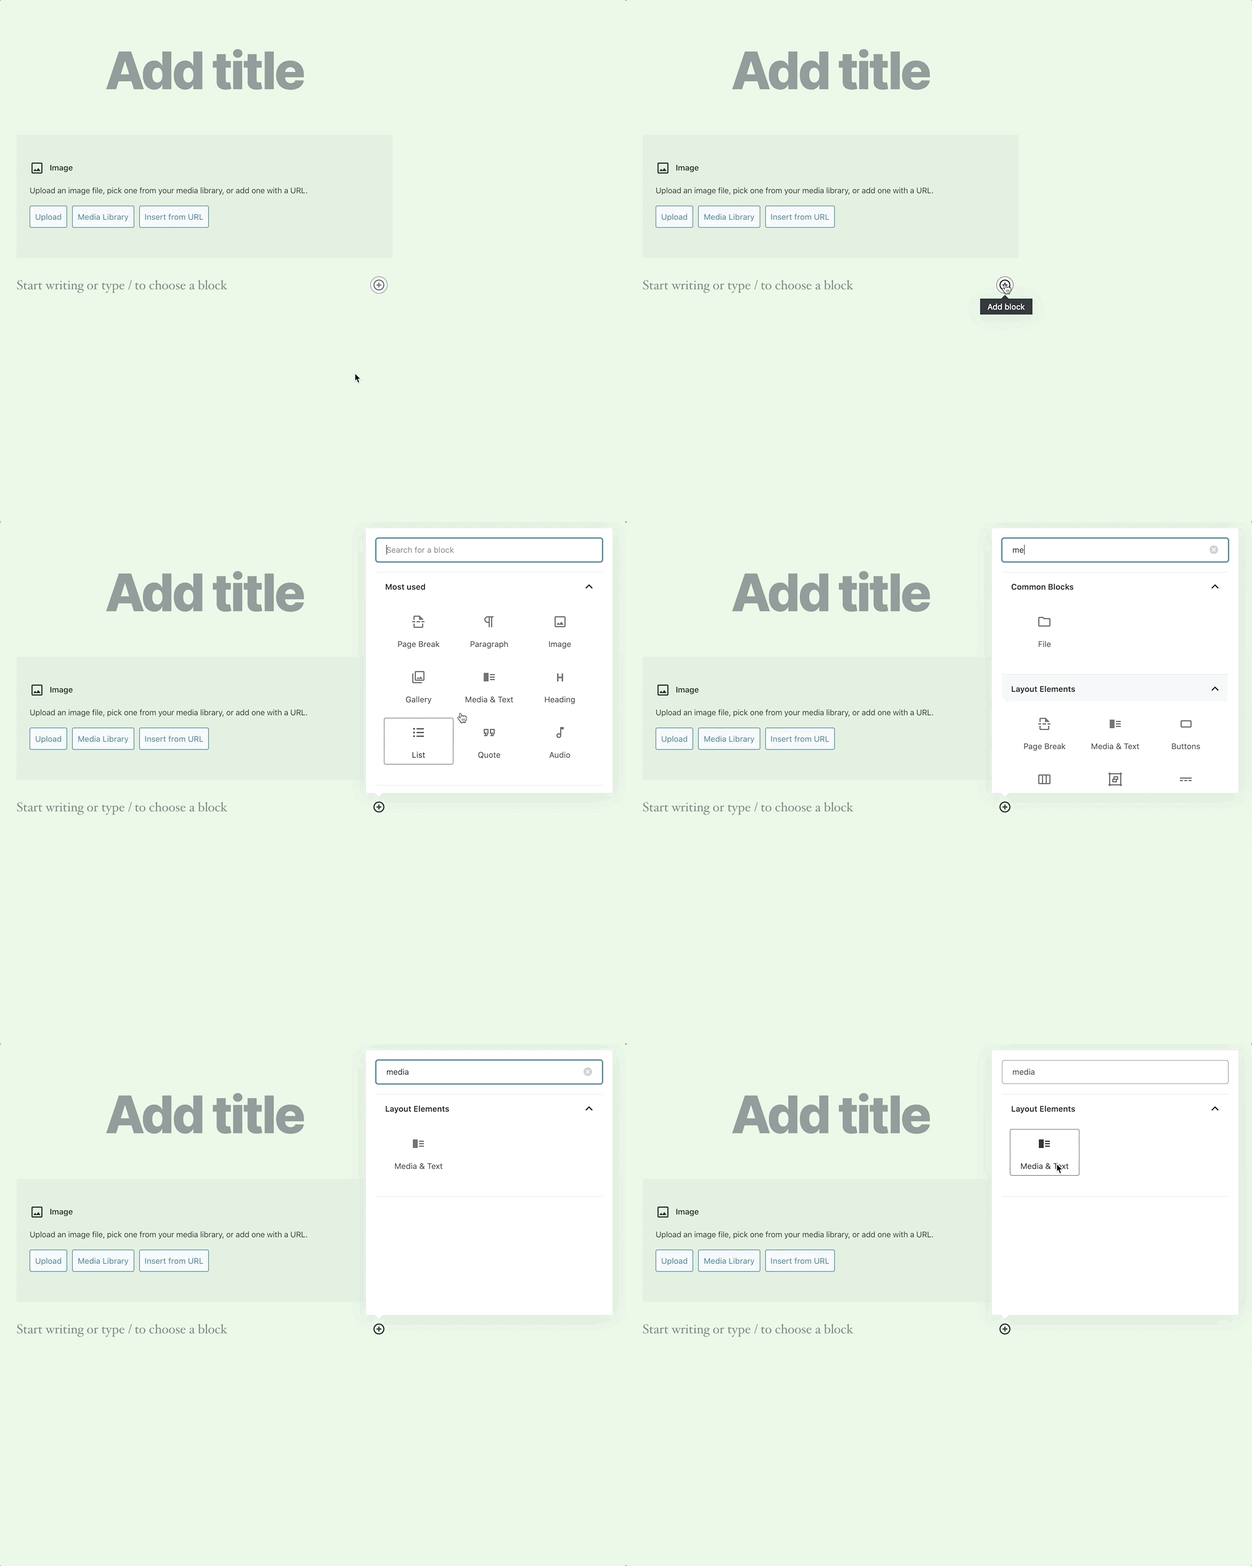
If you want to add a media block (an image with an accompanying text on the right-hand side of the image), you can choose that block type in the “Block browser” instead. Once you see the block, the method of uploading an image is the same as for the image field (click the “Upload” and add the image):

Step 5. Add the correct play to the metadata for your post
Importantly, before you can publish your project to the course website, you need to choose the play that you’ve created your project around. If you do not carefully follow this step, your project will not show up on the website correctly.
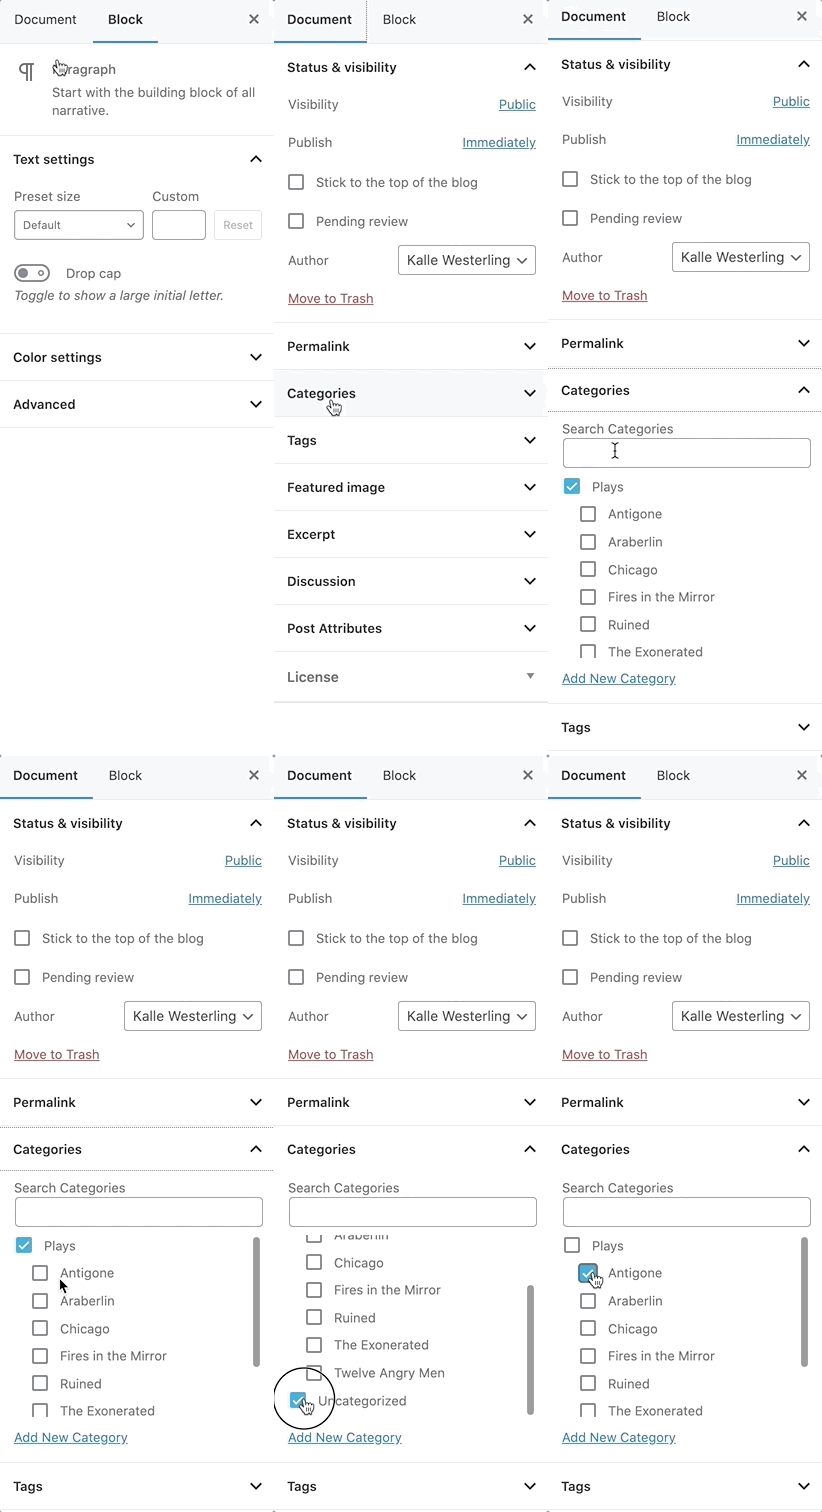
On the right-hand side in the editor, you will see a toolbar. Navigate to the “Document” tab and make sure the correct play’s name is checked in the “Categories” list.
Also make sure that “Uncategorized” and “Plays” are both unchecked.
Step 6. Publish
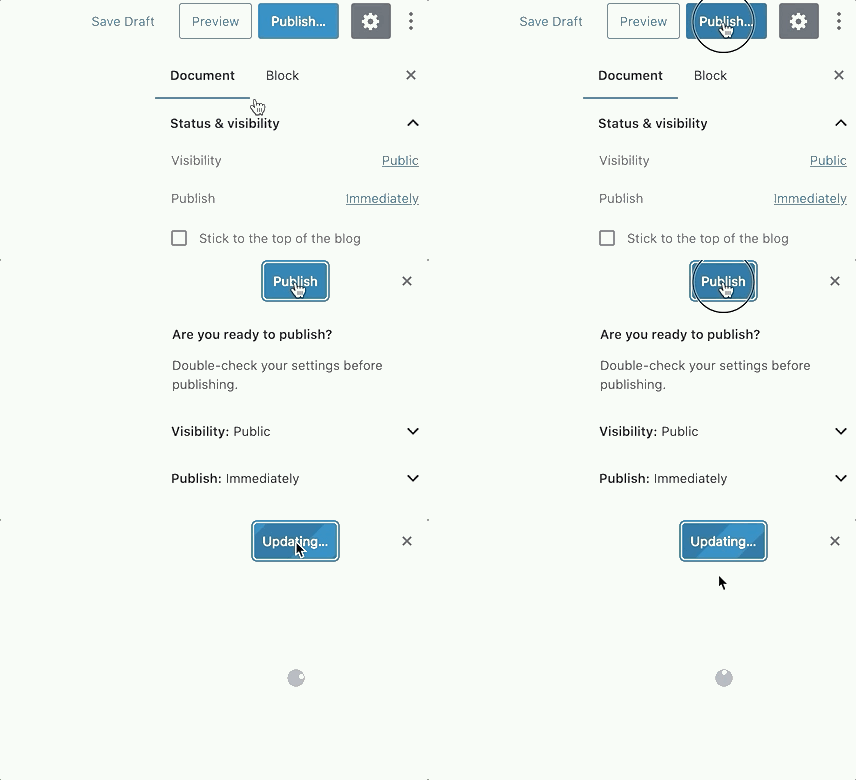
Once you have completed all of the steps above and you’re ready to put the project out into the world, click the “Publish…” button in the top right corner of your browser. Then, click the “Publish” button that appears.
You’re done!


